For a given audio dataset, can we do audio classification using Spectrogram? well, let's try it out ourselves and let's use Google AutoML Vision to fail fast :D
We'll be converting our audio files into their respective spectrograms and use spectrogram as images for our classification problem.
Here is the formal definition of the Spectrogram
A Spectrogram is a visual representation of the spectrum of frequencies of a signal as it varies with time.
For this experiment, I'm going to use the following audio dataset from Kaggle
go ahead and download the dataset {Caution!! : The dataset is over 5GB, so you need to be patient while you perform any action on the dataset. For my experiment, I have rented a Linux virtual machine on Google Could Platform (GCP) and I'll be performing all the steps from there. Moreover, you need a GCP account to follow this tutorial}
Step 1: Download the Audio Dataset
Training Data (4.1 GB)
curl https://zenodo.org/record/2552860/files/FSDKaggle2018.audio_train.zip?download=1 --output audio_train.zip

upzip audio_train.zip
Test Data (524 MB)
curl https://zenodo.org/record/2552860/files/FSDKaggle2018.audio_test.zip?download=1 --output audio_test.zip

unzip audio_test.zip
Metadata (150 KB)
curl https://zenodo.org/record/2552860/files/FSDKaggle2018.meta.zip?download=1 --output meta_data.zip

unzip meta_data.zip
After downloading and unzipping you should have the following things in your folder
(Note: I have the renamed the folder after unzipping )

Step 2: Generate Spectrograms
Now that we have our audio data in place, let's create spectrograms for each audio file.
We'll need FFmpeg to create spectrograms of audio files
Install FFmpeg using the following command
sudo apt-get install ffmpeg
Try it out yourself… go into the folder which has an audio file and run the following command to create its spectrogram
ffmpeg -i audioFileName.wav -lavfi showspectrumpic=s=1024x512 anyName.jpg
For example, "00044347.wav" from training dataset will sound like this
and spectrogram of "00044347.wav" looks like this

As you can see, the red area shows loudness of the different frequencies present in the audio file and it is represented over time. In the above example, you heard a hi-hat. The first part of the file is loud, and then the sound fades away and the same can be seen in its spectrogram.
The above ffmpeg command creates spectrogram with the legend, however; we do not require legend for image processing so let's drop legend and create a plain spectrogram for all our image data.
Use the following shell script to convert all your audio files into their respective spectrograms
(Create and run the following shell script at the directory level where "audio_data" folder is present)
I have moved all the generated image file into the folder "spectro_data"

Step 3: Move image files to Storage
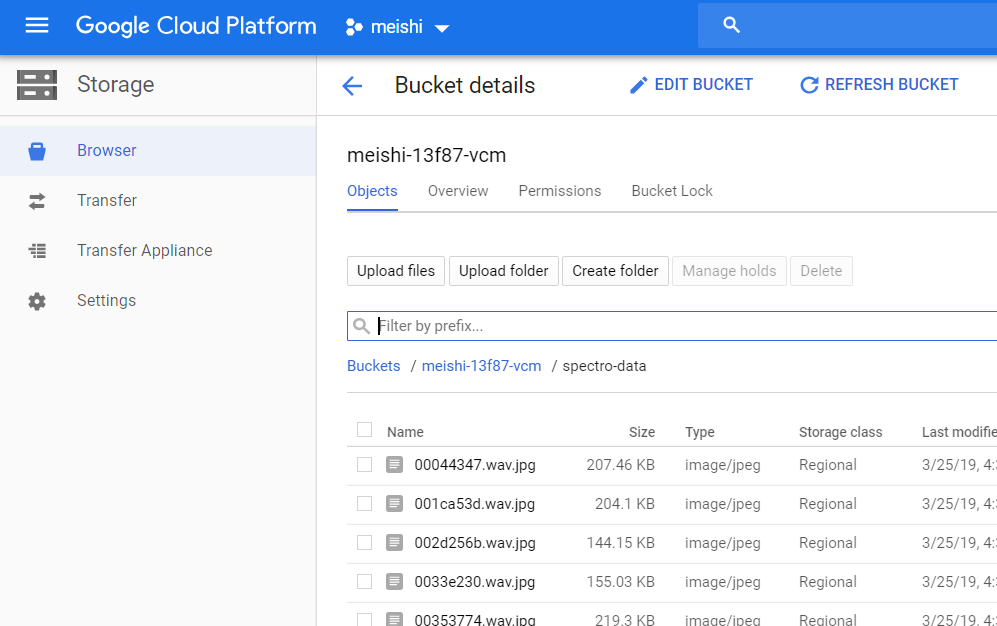
Now that we have generated spectrograms for our training audio data, let's move all these image files on Google Cloud Storage (GCS) and from there we will use those files in AutoML Vision UI.
Use the following command to copy image files to GCS
gsutil cp spectro_data/* gs://your-bucket-name/spectro-data/

Step 4: Prepare file paths and their label
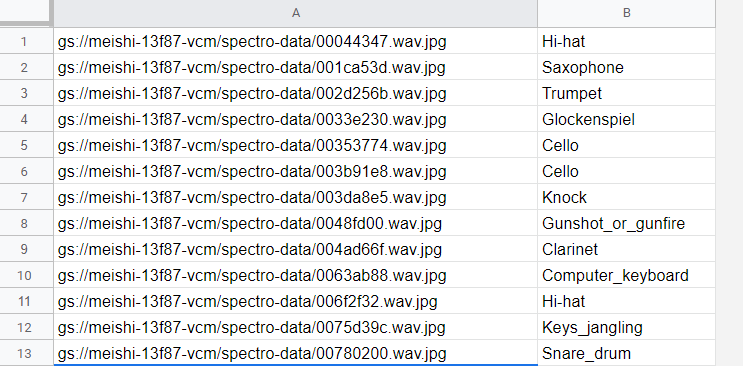
I have created the following CSV file using metadata that we have downloaded earlier. Removing all the other columns, I have kept only the image file location and its label because that's what is needed for AutoML.

You will have to put this CSV file on your Cloud Storage where the other data is stored.
Step 5: Create a new Dataset and Import Images
Go to AutoML Vision UI and create a new dataset

Enter dataset name as per your choice and for importing images, choose the second options "Select a CSV file on Cloud Storage" and provide the path to the CSV file on your cloud storage.

The process of importing images may take a while, so sit back and relax. You'll get an email from AutoML once the import is completed.
After importing of image data is done, you'll see something like this

Step 6: Start Training
This step is super simple… just verify your labels and start training. All the uploaded images will be automatically divided into training, validation and test set.

Give a name to your new model and select a training budget
For our experiment let's select 1 node hour (free*) as training budget and start training the model and see how it performs.

Now again wait for training to complete. You'll receive an email once the training is completed, so you may leave the screen and come back later, meanwhile; let the model train.

Step 7: Evaluate
and here are the results…

Hurray … with very minimal efforts our model did pretty well

Congratulations! with only a few hours of work and with the help of AutoML Vision we are now pretty much sure that classification of given audio files using its spectrogram can be done using machine learning vision approach. With this conclusion, now we can build our own vision model using CNN and do parameter tuning and produce more accurate results.
Or, if you don't want to build your own model, go ahead and train the same model with more number of node-hours and use the instructions given in PREDICT tab to use your model in production.
That's it for this post, I'm Vivek Amilkanthawar from Goalist. See you soon with one of such next time; until then, Happy Learning :)