Hello World! My name is Vivek Amilkanthawar
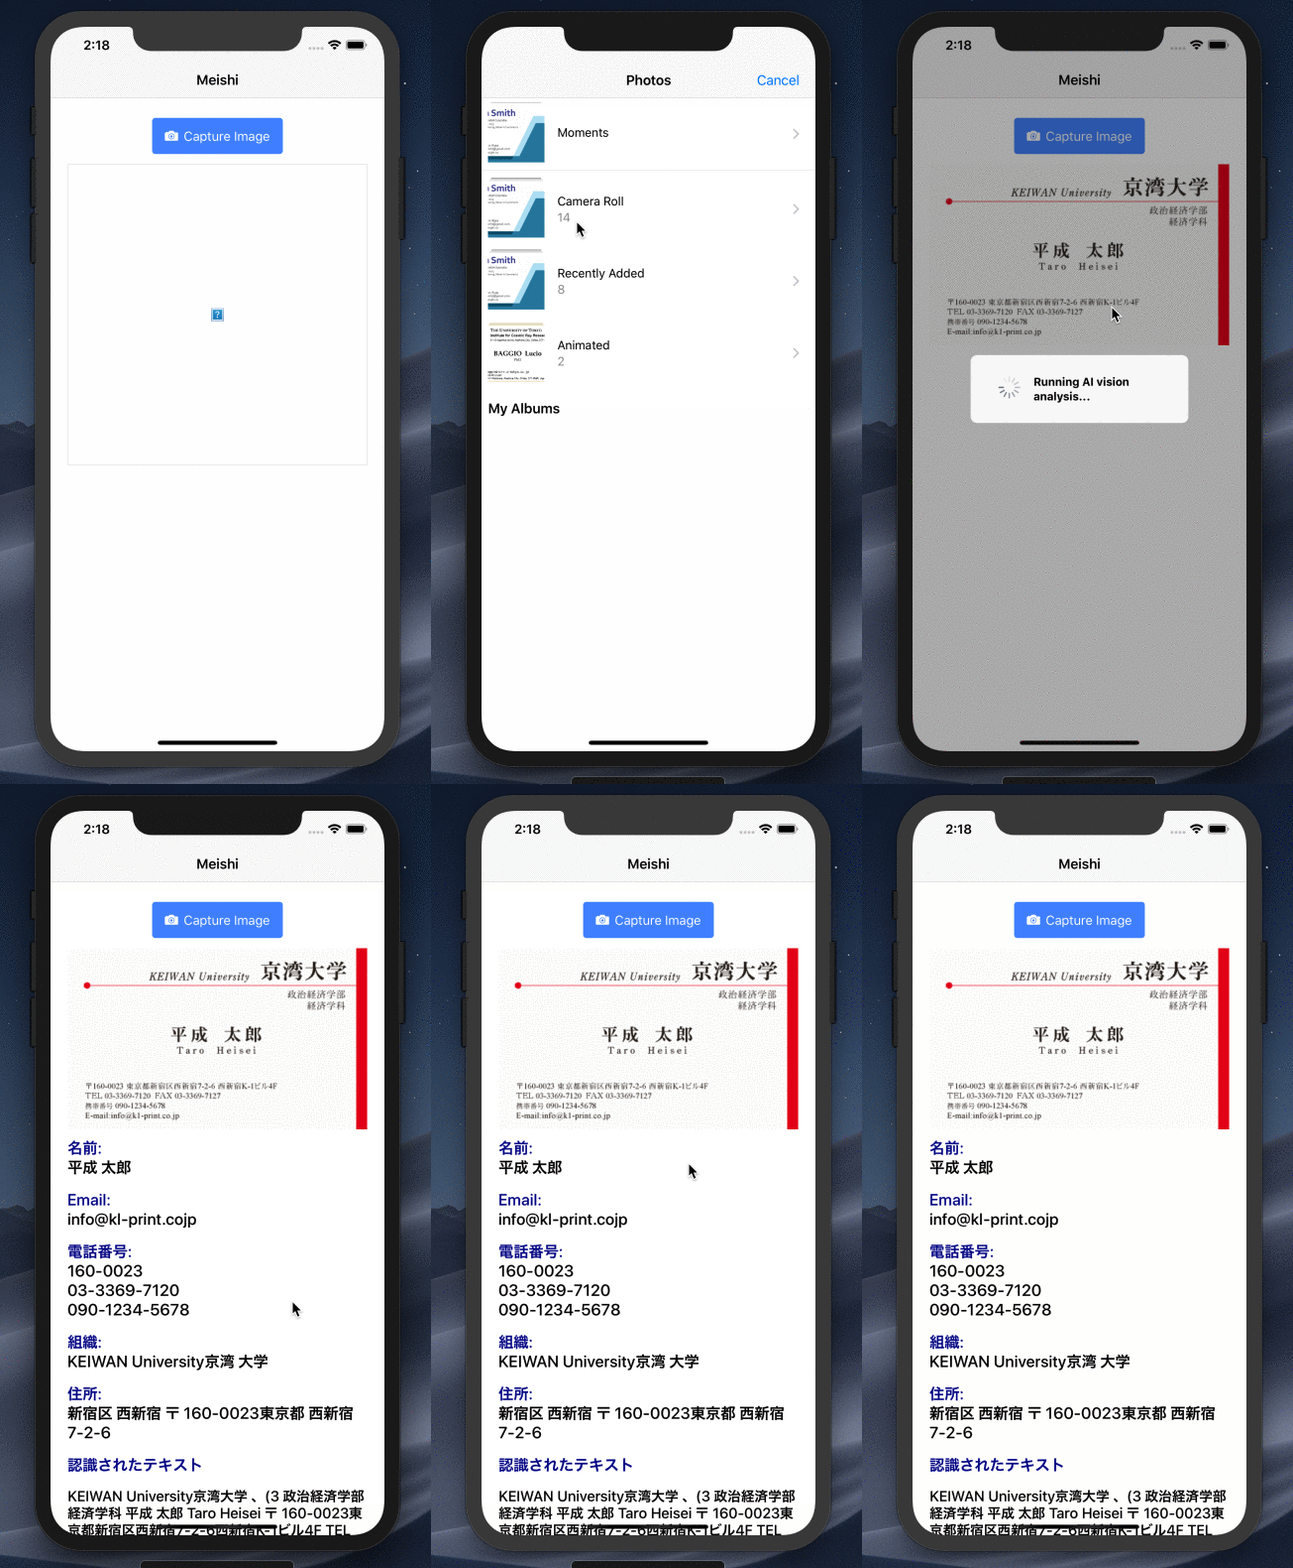
In this and the subsequent blog posts, we'll be creating a Business Card Reader as an iOS App with the help of
Ionic, Firebase, Google Cloud Vision API and Google Natural Language API
The final app will look something like this

Okay so let's get started...
The entire process can be broken down into the following steps.
1) User uploads an image to Firebase storage via @angular/fire in Ionic.
2) The upload triggers a storage cloud function.
3) The cloud function sends the image to the Cloud Vision API
4) Result of image analysis is then sent to Cloud Language API and the final results are saved in Firestore.
5) The final result is then updated in realtime in the Ionic UI.
Let's finish up the important stuff first... the backend. In this blog post we'll be writing Cloud Function to do this job... (step #2, step #3 and step #4 of the above process)
The job of the cloud function that we are about to write can be visualized as below:

Whenever the new image is uploaded to the storage, our cloud function will get triggered and the function will call Google Machine Learning APIs to perform Vision analysis on the uploaded image. Once the image analysis is over the recognized text is then passed to Language API to separate meaningful information.
Step 1: Set up Firebase CLI
Install Firebase CLI via npm using following command
npm install firebase-functions@latest firebase-admin@latest --save
npm install -g firebase-tools
Step 2: Initialize Firebase SDK for Cloud Functions
To initialize your project:
1) Run firebase login to log in via the browser and authenticate the firebase tool.
2) Go to your Firebase project directory.
3) Run firebase init functions
4) When asked for the language of choice/support chose Typescript
After these commands complete successfully, your project structure should look like this:
myproject
 +- .firebaserc    # Hidden file that helps you quickly switch between
 |                 # projects with `firebase use`
 |
 +- firebase.json  # Describes properties for your project
 |
 +- functions/     # Directory containing all your functions code
      |
      +- tslint.json  # Optional file containing rules for TypeScript linting.
      |
      +- tsconfig.json  # file containing configuration for TypeScript.
      |
      +- package.json  # npm package file describing your Cloud Functions code
      |
      +- node_modules/ # directory where your dependencies (declared in package.json) are installed
      |
      +- src/
          |
          +- index.ts      # main source file for your Cloud Functions code
Step 3: Write your code
All you have to edit is the index.ts file
1) Get all your imports correct, we need
@google-cloud/vision for vision analysis
@google-cloud/language for language analysis
firebase-admin for authentication and initialization of app
firebase-functions to get hold on the trigger when a new image file is updated to storage bucket on firebase
2)onFinalize method is triggered when the uploading of the image is completed. The URL of a newly uploaded Image File can be captured here.
3) Pass the image URL to visionClient to perform text detection on the image
4) visionResults is a plain text string containing all the words/characters recognized during image analysis
5) Pass this result to language API to get meaning full information from the text.
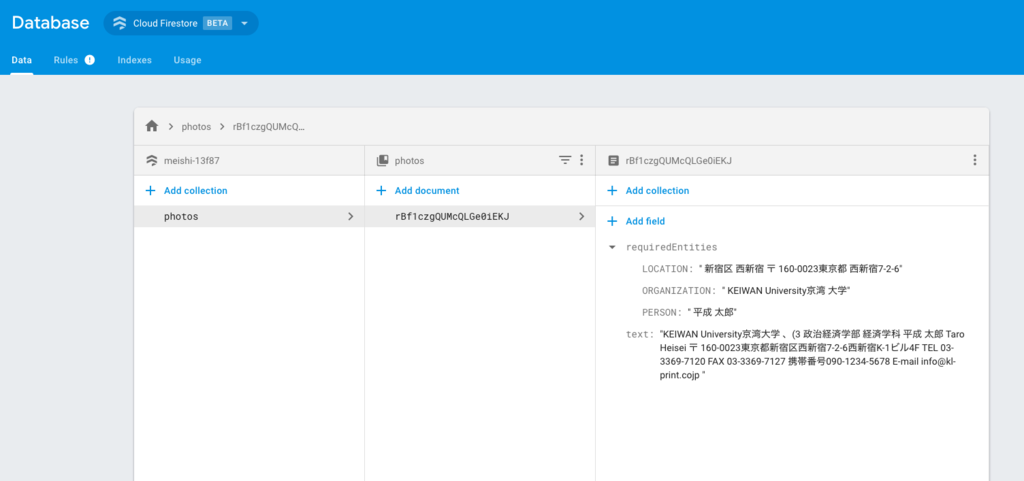
Language API categorizes the text into different entities. Out of various entities let's filter only the requiredEntities which are person name, location/address, and organization.
(Phone number and Email can be extracted by using regex, we will do this at the front end)
6) Finally, save the result into Firestore Database
import * as functions from 'firebase-functions';
import * as admin from 'firebase-admin';
import * as vision from '@google-cloud/vision'; // Cloud Vision API
import * as language from '@google-cloud/language'; // Cloud Natural Language API
import * as _ from 'lodash';

admin.initializeApp(functions.config().firebase);

const visionClient = new vision.ImageAnnotatorClient();
const languageClient = new language.LanguageServiceClient();

let text; // recognized text
const requiredEntities = {ORGANIZATION: '', PERSON: '', LOCATION: ''};

// Dedicated bucket for cloud function invocation
const bucketName = 'meishi-13f87.appspot.com';

export const imageTagger = functions.storage.
    object().
    onFinalize(async (object, context) => {

      /** Get the file URL of newly uploaded Image File **/
      // File data
      const filePath = object.name;

      // Location of saved file in bucket
      const imageUri = `gs://${bucketName}/${filePath}`;

      /** Perform vision and language analysis **/
      try {

        // Await the cloud vision response
        const visionResults = await visionClient.textDetection(imageUri);

        const annotation = visionResults[0].textAnnotations[0];
        text = annotation ? annotation.description : '';

        // pass the recognized text to Natural Language API
        const languageResults = await languageClient.analyzeEntities({
          document: {
            content: text,
            type: 'PLAIN_TEXT',
          },
        });

        // Go through detected entities
        const {entities} = languageResults[0];

        _.each(entities, entity => {
          const {type} = entity;
          if (_.has(requiredEntities, type)) {
            requiredEntities[type] += ` ${entity.name}`;
          }
        });

      } catch (err) {
        // Throw an error
        console.log(err);
      }

      /** Save the result into Firestore **/
          // Firestore docID === file name
      const docId = filePath.split('.jpg')[0];
      const docRef = admin.firestore().collection('photos').doc(docId);
      return docRef.set({text, requiredEntities});

    });
Step 4: Deploy your function
Run this command to deploy your functions:
firebase deploy --only functions
Storage
 Database

That's it.. with this our backend is pretty much ready.
Let's work on front-end side in the upcoming blog post till then
Happy Learning :)
Reference: