Goalist Developers Blog

Angular 4 から 5 にアップデートしてみた

こんにちは、ゴーリスト開発の飯尾です。
みなさんも大好きなAngular、ほんの一週間ほど前にバージョン5が出ましたね。

blog.angular.io

というわけで

  • 羽のように軽い気持ちで
  • Angular4で作ったアプリを5に上げたら
  • 一体どうなるのか!?

試してみます

互換性の確認

angular/CHANGELOG.md at master · angular/angular · GitHub

BREAKING CHANGES をチェケです
関係ありそうなのはこのあたりでしょうか…

Angular now requires TypeScript 2.4.x.

@angular/platform-server now additionally depends on @angular/platform-browser-dynamic as a peer dependency.

ncu でパッケージの更新確認してみます

$ ncu
 @angular/common                     ^4.0.0  →   ^5.0.0 
 @angular/compiler                   ^4.0.0  →   ^5.0.0 
 @angular/core                       ^4.0.0  →   ^5.0.0 
 @angular/forms                      ^4.0.0  →   ^5.0.0 
 @angular/http                       ^4.0.0  →   ^5.0.0 
 @angular/platform-browser           ^4.0.0  →   ^5.0.0 
 @angular/platform-browser-dynamic   ^4.0.0  →   ^5.0.0 
 @angular/router                     ^4.0.0  →   ^5.0.0 
 @angular/compiler-cli               ^4.0.0  →   ^5.0.0 
 @types/jasmine                      2.5.38  →    2.6.3 
 @types/node                        ~6.0.60  →  ~8.0.49 
 codelyzer                           ~2.0.0  →   ~4.0.1 
 jasmine-core                        ~2.5.2  →   ~2.8.0 
 jasmine-spec-reporter               ~3.2.0  →   ~4.2.1 
 karma                               ~1.4.1  →   ~1.7.1 
 karma-chrome-launcher               ~2.0.0  →   ~2.2.0 
 karma-coverage-istanbul-reporter    ^0.2.0  →   ^1.3.0 
 protractor                          ~5.1.0  →   ~5.2.0 
 ts-node                             ~2.0.0  →   ~3.3.0 
 tslint                              ~4.5.0  →   ~5.8.0 
 typescript                          ~2.2.0  →   ~2.6.1 

The following dependencies are satisfied by their declared version range, but the installed versions are behind. You can install the latest versions without modifying your package file by using npm update. If you want to update the dependencies in your package file anyway, run ncu -a.

 @agm/core          ^1.0.0-beta.0  →  ^1.0.0-beta.2 
 @types/googlemaps       ^3.26.16  →        ^3.29.2 
 core-js                   ^2.4.1  →         ^2.5.1 
 rxjs                      ^5.1.0  →         ^5.5.2 
 zone.js                   ^0.8.4  →        ^0.8.18 

Run ncu with -u to upgrade package.json

TypeScriptのバージョンは上がりますね
@angular/platform-browser-dynamic は入れてあったのでOK

Angular CLI のアップデート

とりあえずCLIの方から上げていきます

$ ng -v
    _                      _                 ____ _     ___
   / \   _ __   __ _ _   _| | __ _ _ __     / ___| |   |_ _|
  / △ \ | '_ \ / _` | | | | |/ _` | '__|   | |   | |    | |
 / ___ \| | | | (_| | |_| | | (_| | |      | |___| |___ | |
/_/   \_\_| |_|\__, |\__,_|_|\__,_|_|       \____|_____|___|
               |___/
@angular/cli: 1.1.3
node: 6.10.2
os: darwin x64
@angular/common: 4.2.4
@angular/compiler: 4.2.4
@angular/core: 4.2.4
@angular/forms: 4.2.4
@angular/http: 4.2.4
@angular/platform-browser: 4.2.4
@angular/platform-browser-dynamic: 4.2.4
@angular/router: 4.2.4
@angular/cli: 1.1.3
@angular/compiler-cli: 4.2.4

$ npm update @angular/cli

$ ng -v

    _                      _                 ____ _     ___
   / \   _ __   __ _ _   _| | __ _ _ __     / ___| |   |_ _|
  / △ \ | '_ \ / _` | | | | |/ _` | '__|   | |   | |    | |
 / ___ \| | | | (_| | |_| | | (_| | |      | |___| |___ | |
/_/   \_\_| |_|\__, |\__,_|_|\__,_|_|       \____|_____|___|
               |___/
    
Angular CLI: 1.5.0
Node: 6.10.2
OS: darwin x64
Angular: 4.2.4
... common, compiler, compiler-cli, core, forms, http
... platform-browser, platform-browser-dynamic, router
... tsc-wrapped

@angular/cli: 1.5.0
@angular-devkit/build-optimizer: 0.0.32
@angular-devkit/core: 0.0.20
@angular-devkit/schematics: 0.0.35
@ngtools/json-schema: 1.1.0
@ngtools/webpack: 1.8.0
@schematics/angular: 0.1.1
typescript: 2.2.2
webpack: 3.8.1

ng buildもまだまだふつうにできました

Angular 4 to 5

パッケージ更新

まずはncu -uでpackage.jsonの更新

$ ncu -u
 @angular/common                     ^4.0.0  →   ^5.0.0 
 @angular/compiler                   ^4.0.0  →   ^5.0.0 
 @angular/core                       ^4.0.0  →   ^5.0.0 
 @angular/forms                      ^4.0.0  →   ^5.0.0 
 @angular/http                       ^4.0.0  →   ^5.0.0 
 @angular/platform-browser           ^4.0.0  →   ^5.0.0 
 @angular/platform-browser-dynamic   ^4.0.0  →   ^5.0.0 
 @angular/router                     ^4.0.0  →   ^5.0.0 
 @angular/compiler-cli               ^4.0.0  →   ^5.0.0 
 @types/jasmine                      2.5.38  →    2.6.3 
 @types/node                        ~6.0.60  →  ~8.0.49 
 codelyzer                           ~2.0.0  →   ~4.0.1 
 jasmine-core                        ~2.5.2  →   ~2.8.0 
 jasmine-spec-reporter               ~3.2.0  →   ~4.2.1 
 karma                               ~1.4.1  →   ~1.7.1 
 karma-chrome-launcher               ~2.0.0  →   ~2.2.0 
 karma-coverage-istanbul-reporter    ^0.2.0  →   ^1.3.0 
 protractor                          ~5.1.0  →   ~5.2.0 
 ts-node                             ~2.0.0  →   ~3.3.0 
 tslint                              ~4.5.0  →   ~5.8.0 
 typescript                          ~2.2.0  →   ~2.6.1 

The following dependencies are satisfied by their declared version range, but the installed versions are behind. You can install the latest versions without modifying your package file by using npm update. If you want to update the dependencies in your package file anyway, run ncu -a.

 @agm/core          ^1.0.0-beta.0  →  ^1.0.0-beta.2 
 @types/googlemaps       ^3.26.16  →        ^3.29.2 
 core-js                   ^2.4.1  →         ^2.5.1 
 rxjs                      ^5.1.0  →         ^5.5.2 
 zone.js                   ^0.8.4  →        ^0.8.18 

Upgraded /path/to/app/package.json

アップデート実行!

$ npm update
my-app
├── @agm/core@1.0.0-beta.2 
├── UNMET PEER DEPENDENCY @angular/common@5.0.0
├── @angular/compiler@5.0.0 
├── @angular/compiler-cli@5.0.0 
├── UNMET PEER DEPENDENCY @angular/core@5.0.0
├── UNMET PEER DEPENDENCY @angular/forms@5.0.0
├── @angular/http@5.0.0 
├── @angular/platform-browser@5.0.0 
├── @angular/platform-browser-dynamic@5.0.0 
├── @angular/router@5.0.0 
├── @types/googlemaps@3.29.2 
├── @types/jasmine@2.6.3 
├── @types/node@8.0.49 
├── codelyzer@4.0.1 
├── core-js@2.5.1 
├── jasmine-core@2.8.0 
├── jasmine-spec-reporter@4.2.1 
├── karma@1.7.1 
├── karma-chrome-launcher@2.2.0 
├── karma-coverage-istanbul-reporter@1.3.0 
├── protractor@5.2.0 
├── rxjs@5.5.2 
├── ts-node@3.3.0 
├── tslint@5.8.0 
├── UNMET PEER DEPENDENCY typescript@2.6.1
└── zone.js@0.8.18 

npm WARN @angular-mdl/core@4.0.8 requires a peer of @angular/core@>=4.0.0 <5.0.0 but none was installed.
npm WARN @angular-mdl/core@4.0.8 requires a peer of @angular/common@>=4.0.0 <5.0.0 but none was installed.
npm WARN @angular-mdl/core@4.0.8 requires a peer of @angular/forms@>=4.0.0 <5.0.0 but none was installed.
npm WARN @angular/compiler-cli@5.0.0 requires a peer of typescript@>=2.4.2 <2.5 but none was installed.
npm WARN tsickle@0.24.1 requires a peer of typescript@2.4.2 but none was installed.

怒られているゥ…

@angular-mdl/core はまだ5に未対応、放置するとして

TypeScriptは2.4.x だったので
package.jsonを"typescript": "~2.4"に書き換える

npmのキャッシュクリーンからのインストール

$ rm -r node_modules
$ npm cache clean
$ npm install

ぶじtypescript@2.4.2 になりました

ビルドしてみる

コンパイル通ってくれ…
祈りのng serve

ERROR in src/app/service/request.service.ts(34,5): error TS2322: Type 'Observable<{} | Response>' is not assignable to type 'Observable<Response>'.
  Type '{} | Response' is not assignable to type 'Response'.
    Type '{}' is not assignable to type 'Response'.
      Property 'type' is missing in type '{}'.

赤字エラ〜〜〜〜

対処

これを

public post(params: string): Observable<Response> {
  ・・・
  return this.http.post(url, params)
    .catch((error) => {
      throw new Error(error);
    });
}

こう!

public post(params: string): Observable<Response> {
  ・・・
  return this.http.post(url, params)
    .catch((error) => {
      Observable.throw(error);
    });
}


次はキサマだ

ERROR in src/app/conponents/popover/popover.component.ts(69,11): error TS2322: Type 'Observable<{} | Event>' is not assignable to type 'Observable<Event>'.
  Type '{} | Event' is not assignable to type 'Event'.
    Type '{}' is not assignable to type 'Event'.
      Property 'bubbles' is missing in type '{}'.

これを

const stream: Observable<Event> = Observable
      .merge(Observable.fromEvent(document, 'click'), Observable.fromEvent(document, 'touchend'));

こう!

const stream: Observable<Event> = Observable
      .merge(Observable.fromEvent(document, 'click'), Observable.fromEvent(document, 'touchend'))
      .catch(e => Observable.throw(e));


ウオオアアアーーー

qiita.com

そういえば

こんなこと書いてあったので

Developers appreciated the new HttpClient (introduced in version 4.3) so the team is now recommending HttpClient for all applications, and deprecating the previous @angular/http library.

jaxenter.com

Httpクライアントモジュールは
@angular/http が非推奨になって
@angular/common/http を使うのが主流になっていくみたいです

こちらの解説が詳しい…アリガトウゴザイマス

qiita.com

めっちゃ推されてるビルド速度について

Angular 4.2.4 / Angular CLI 1.1.3

$ ng build
Time: 20935ms
chunk    {0} polyfills.bundle.js, polyfills.bundle.js.map (polyfills) 283 kB {4} [initial] [rendered]
chunk    {1} main.bundle.js, main.bundle.js.map (main) 103 kB {3} [initial] [rendered]
chunk    {2} styles.bundle.js, styles.bundle.js.map (styles) 45.6 kB {4} [initial] [rendered]
chunk    {3} vendor.bundle.js, vendor.bundle.js.map (vendor) 3.36 MB [initial] [rendered]
chunk    {4} inline.bundle.js, inline.bundle.js.map (inline) 0 bytes [entry] [rendered]

Angular 5.0.0 / Angular CLI 1.5.0

$ ng build
Time: 19193ms
chunk {inline} inline.bundle.js, inline.bundle.js.map (inline) 5.83 kB [entry] [rendered]
chunk {main} main.bundle.js, main.bundle.js.map (main) 129 kB [initial] [rendered]
chunk {polyfills} polyfills.bundle.js, polyfills.bundle.js.map (polyfills) 383 kB [initial] [rendered]
chunk {styles} styles.bundle.js, styles.bundle.js.map (styles) 41.8 kB [initial] [rendered]
chunk {vendor} vendor.bundle.js, vendor.bundle.js.map (vendor) 4.45 MB [initial] [rendered]

$ ng build --aot
Time: 23034ms
chunk {inline} inline.bundle.js, inline.bundle.js.map (inline) 5.83 kB [entry] [rendered]
chunk {main} main.bundle.js, main.bundle.js.map (main) 338 kB [initial] [rendered]
chunk {polyfills} polyfills.bundle.js, polyfills.bundle.js.map (polyfills) 383 kB [initial] [rendered]
chunk {styles} styles.bundle.js, styles.bundle.js.map (styles) 41.8 kB [initial] [rendered]
chunk {vendor} vendor.bundle.js, vendor.bundle.js.map (vendor) 3.33 MB [initial] [rendered]

あんまり違いが…

感想

Observableの処理をしっかりやる以外は特に変更なしでいけました〜
あとは非推奨になってしまった通信部分の書き換えとかですね

年明けてバグとかライブラリ周り落ち着いてきたら
本番アプリでもあてていくつもりです( ˘ω˘)

Terraformに足を誘われて...

どうも,新卒エンジニアのナカノです.

今回から,技術ブログらしい記事を投稿していこうと思います.

最近までは「AWS,CloudFormation,Terraform,暗号化実装」などを学習してきたので,今後はこれらに関する記事を書いていく予定です.

そして初回は,Terraformに関するintroductionの記事となります.


目 次
  • Terraformって何なの?   
    • 概要
    • メリット
  • どうやって使うの?   
    • 環境構築
    • 利用方法
  • 締め括り
  • 参考文献


Terraformって何なの?

概要

Terraformとは,HashiCorpという会社がつくったinfrastructure as code softwareです.つまり,コードを書いてインフラリソースの作成や管理を行うことが可能な,インフラの構成管理ツールです.

コードを作成する場合,HashiCorp Configuration Language(通称,HCL)というJSON-likeな表記記法を使います.これはJSON-likeなので,JSONに慣れている方は割と直ぐに馴染むかもしれません.

メリット

Infrastructure as Codeの実現

まず,Terraformはinfrastructure as code softwareなので,インフラの作成や管理を効率的に行うことが出来るという利点があります.

hardwareの様な場合だとインフラ管理が非常に面倒であり,またインフラ構成を変更することになれば都度に機器を変えることが求められます.

一方で,構成管理ツールを用いれば,インフラ管理を行う際には設定ファイルのコードを編集するだけで済むので作業が非常に効率的になります.

また,インフラ構成の変更に対しても柔軟に対応することが出来るため,この様なツールを用いた作業方法はアジャイル開発に非常に適していると言えます.

対応するProviderの種類が多い

Terraformが対応出来るProviderはAWS以外に多くのものがあります.ここではそれらを列挙するのは面倒なので,気になる方はTerraformの公式ドキュメントを参照なさってください.

AWSに限って言えばインフラの構成管理ツールとしてはCloudFormationでも良さそうな気がしますが,何らかのタイミングでProviderが変わる場合も考えるとTerraformには柔軟性が非常にあると思います.


どうやって使うの?

環境構築

一番簡単な方法は,自分が使用しているOSに対応するzipファイルをTerraformの公式サイトからダウンロードするというものです.

ダウンロードのページは,Terraformの公式サイトのページ右上部にある"Download"の項目をクリックすれば開くことが出来ます.

f:id:r-nakano:20171102144615p:plain

ページを見るとlatest versionしか見当たりませんが,older versionをダウンロードしたい方はそのページにある"download older versions of Terraform"の部分をクリックしていただくとよいです.

f:id:r-nakano:20171102144625p:plain

ダウンロード後,Terraformが使える場所を確認しておきましょう.例えば,"terraform version"というversion確認用のコマンドを打ってうまく実行されればOKです.

利用方法

Terraformを使ってインフラリソースを作成するには,tfファイルをつくってそこに設定用のコードを書く必要があります.基本的には,tfファイルに書くべき設定はresourseやdataに関するもので大丈夫です.

f:id:r-nakano:20171102144950p:plain

そして設定ファイルの作成完了後に"terraform plan"というDry-run用のコマンドを実行してエラーのチェックを行います.

このコマンドの実行後にエラーがないことが確認出来たならば,その次に"terraform apply"というdeploy用のコマンドを実行してリソースを作成します.

この際に注意すべきことが2点あります.1点は,"terraform plan"を実行してエラーが出なかったとしても"terraform apply"の実行時にエラーが出ることがあるということです.そのため,planのコマンドの実行に成功したとしても油断は禁物です.

もう1点は,"terraform apply"の実行に失敗した場合は作成状況がロールバックしないという点です.よって,リソースの作成が正常に行われるまではエラーの原因を分析し,解決のためにplanとapplyのコマンドの実行の繰り返しを行うことが求められます.


締め括り

今回はintroductiveな記事ということで,この辺りで一旦筆を置かせていただこうかと思います.

次回からは具体的なインフラリソースの作成,簡単なインフラのアーキテクチャーの構成などの記事を書いていくつもりです.

2ヶ月前ぐらいから使い始めたばかりではありますが,技術ブログを通じて皆様とTerraformに関する知識を少しでも共有出来ればこの上ないことだと思っております.

それでは,次回以降にご期待ください.


参考文献

以下、Terraformの公式サイトのURLです: www.terraform.io

食欲の秋をしのぐためのアプリを作ってみた

Trick or Treat!渡部です。

f:id:watabe1028:20171031123524p:plain

最近食欲がやばいです。
栗、芋、南瓜の魅力に勝てません。
かといって運動もしたくありません。
 
このままでは太ってしまいます。
DevからDebuになったらおしまいです。

 
せめて夕飯だけでも抑えねば!と思い
何か役立つアプリを作ってみようと考えました。

毎日食べたものを記録するアプリは作るのも
使うのも面倒です。

 
何もしなくても戒めてくれるアプリ・・・

 
そうや!飯時に通知がくるアプリ作ったろ!
ってことで夕飯時に戒めの言葉を送ってくるアプリを作ろうと思います。
割と忙しいし面倒なので最低限の簡単な構成で作ろう!

 
手順
・適当に画面を作る
・ローカル通知を実装
・実行

サクッといきます!


適当に画面を作る

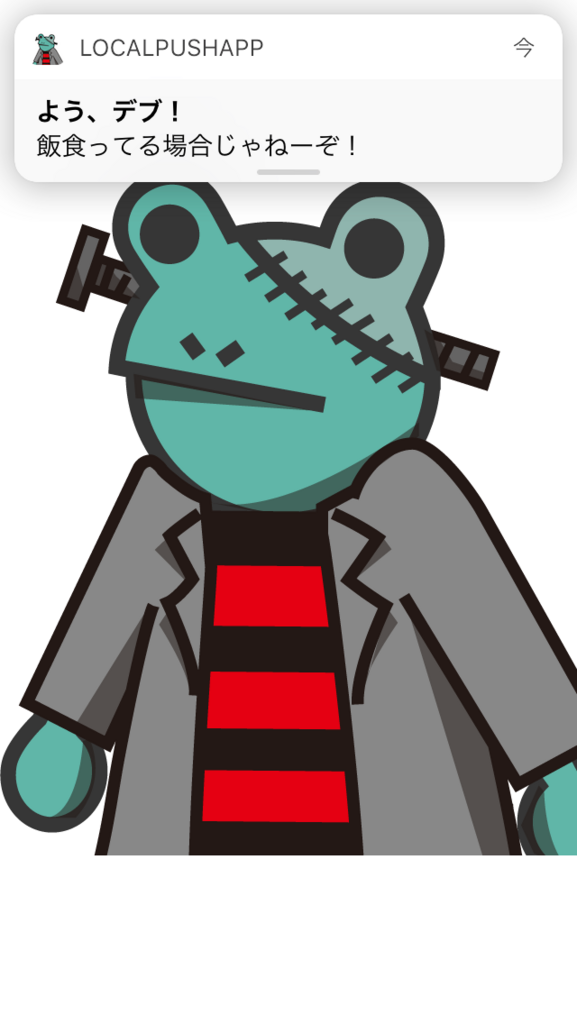
今回は画面は必要ないので弊社サービスを牛耳るふろぐん(4回目)の
ハロウィンバージョンを表示させます。
特に意味はありません。

f:id:watabe1028:20171031120621p:plain


ローカル通知を実装

次に通知の実装です。
前回にリモート通知の実装をしたので詳しくはそちらを参照ください。
まずは3秒後に通知がくるように実装します。
以下のコードを丸々コピペすればおけ!です。
AppDelegate.swiftに書きます。

import UIKit
import UserNotifications    // 追加
import NotificationCenter   // 追加

@UIApplicationMain
class AppDelegate: UIResponder, UIApplicationDelegate, UNUserNotificationCenterDelegate {

    var window: UIWindow?

    func application(_ application: UIApplication, didFinishLaunchingWithOptions launchOptions: [UIApplicationLaunchOptionsKey: Any]?) -> Bool {
        
        // 全ての通知を一括で削除
        UNUserNotificationCenter.current().removeAllPendingNotificationRequests()
        
        // 通知許可ダイアログ
        UNUserNotificationCenter.current().requestAuthorization(options:[.badge, .alert, .sound]) { (granted, error) in if granted {print("通知許可")}
        }
        
        // 通知の設定
        let notificationContent = UNMutableNotificationContent()
        notificationContent.title = "よう、デブ!"
        notificationContent.body = "飯食ってる場合じゃねーぞ!"
        notificationContent.sound = UNNotificationSound.default()
        
        // 3秒後に通知
        let trigger = UNTimeIntervalNotificationTrigger.init(timeInterval: 3, repeats: false)
        let request = UNNotificationRequest.init(identifier: "YoDebuNotification", content: notificationContent, trigger: trigger)
        
        let notificationCenter = UNUserNotificationCenter.current()
        notificationCenter.add(request)
        notificationCenter.delegate = self
        
        return true
    }
    
    // 通知の受信
    func userNotificationCenter(_ center: UNUserNotificationCenter,
                                willPresent notification: UNNotification,
                                withCompletionHandler completionHandler: @escaping (UNNotificationPresentationOptions) -> Void) {
        completionHandler([.alert,.sound])
    }
    
    // 通知に対する操作
    func userNotificationCenter(_ center: UNUserNotificationCenter,
                                didReceive response: UNNotificationResponse,
                                withCompletionHandler completionHandler: @escaping () -> Void) {
        
        // alertで表示
        let contentBody = response.notification.request.content.body
        let alert:UIAlertController = UIAlertController(title: "何も食べません!", message: contentBody, preferredStyle: UIAlertControllerStyle.alert)
        alert.addAction(UIAlertAction(title: "OK", style: UIAlertActionStyle.default, handler: {
            (action:UIAlertAction!) -> Void in
            print("食べないことを誓いました。")
        }))
        self.window?.rootViewController?.present(alert, animated: true, completion: nil)
        
        completionHandler()
    }
}


実行

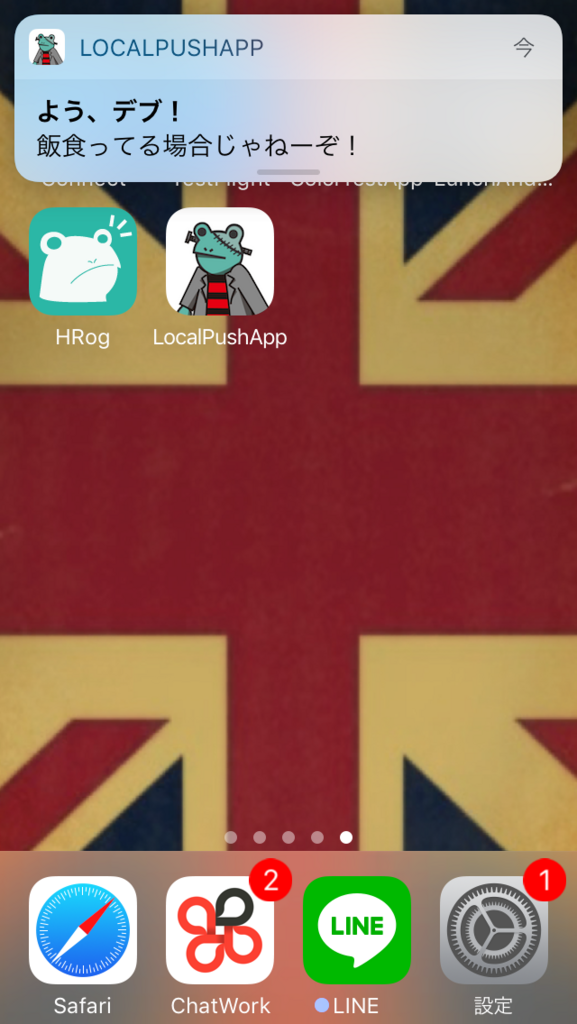
これを実行するとこんな感じで表示されます。

f:id:watabe1028:20171031122628p:plain

アプリを閉じていても
f:id:watabe1028:20171031122735p:plain

 
ふろぐんがにくたらしいですね!


次に時間を指定します。
だいたい21時ごろが夕飯の時間帯なので
21時に通知がくるように設定します。

    // 21時に設定
    let notificationContent = UNMutableNotificationContent()
    notificationContent.title = "よう、デブ!"
    notificationContent.body = "飯食ってる場合じゃねーぞ!"
    notificationContent.sound = UNNotificationSound.default()
        
    let date = DateComponents(hour:21)
    let trigger = UNCalendarNotificationTrigger.init(dateMatching: date, repeats: true)
    let request = UNNotificationRequest.init(identifier: "YoDebuNotification", content: notificationContent, trigger: trigger)
        
    let notificationCenter = UNUserNotificationCenter.current()
    notificationCenter.add(request)
    notificationCenter.delegate = self

以上で完了です。
UNCalendarNotificationTrigger.init(dateMatching: date, repeats: true)
のrepeatsをtrueにしとけば毎日繰り返し通知がくるようになります。


おわり

モンブラン、かぼちゃの煮物、焼き芋に秋刀魚。。。
なかなか食欲を抑えるのは厳しいですが
こういったアプリで自分を律することにします!
できれば・・・ですが・・・

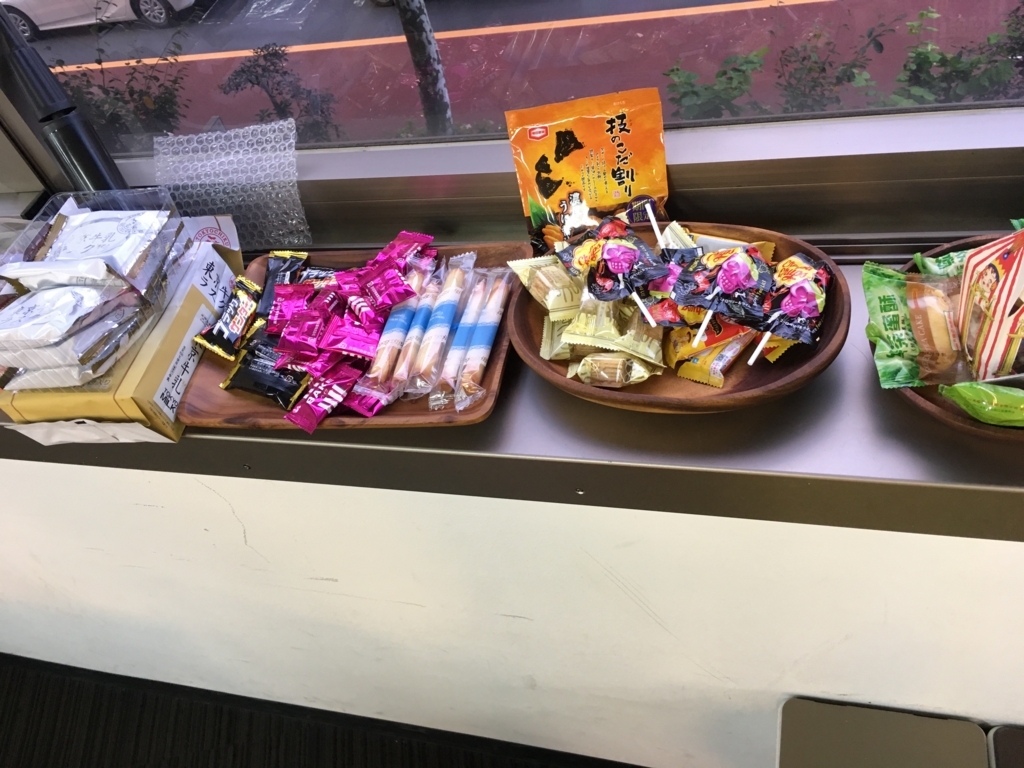
今日はハロウィンのせいか
お菓子が賑わっています。
早速律することをやめます。

f:id:watabe1028:20171031162810j:plain

コトリン入門開始!

読者の皆さん、 こんにちは!

ゴーリストのティンカーです!

いよいよコトリンの入門シリーズスタートです!
ここでちょこちょこコトリンの世界で一緒に迷い、遊び、楽しい時間を過ごすつもりなので、よろしくお願いします!

ではでは、
本日のトピックに関してなんですが、なんと。。。
開発環境の立ち上げとなります。。。!

”え。。。開発に手を加えたいのに。。”
と思ってる方もいらっしゃると思うんですが、大丈夫です!
来週から毎週新しい記事を出すつもりなので、バリバリやりますのでご安心ください!!

では早速なんですが、環境を立ち上げましょう!

今回の流れ

開発環境の設定:

  • 統合開発環境(IDE)、Android Studio 3.0のインストール(Mac上)。
  • 仮想端末(バーチャルデバイス)の作成。

それだけです!!

まずはダウンロードから行きます!

こちらのURL(アンドロイドの公式サイト)にてインストールの指示に従い、ダウンロードし、インストールしてください!

https://developer.android.com/studio/install.html (画面の一番下から言語を日本語に変更できます)

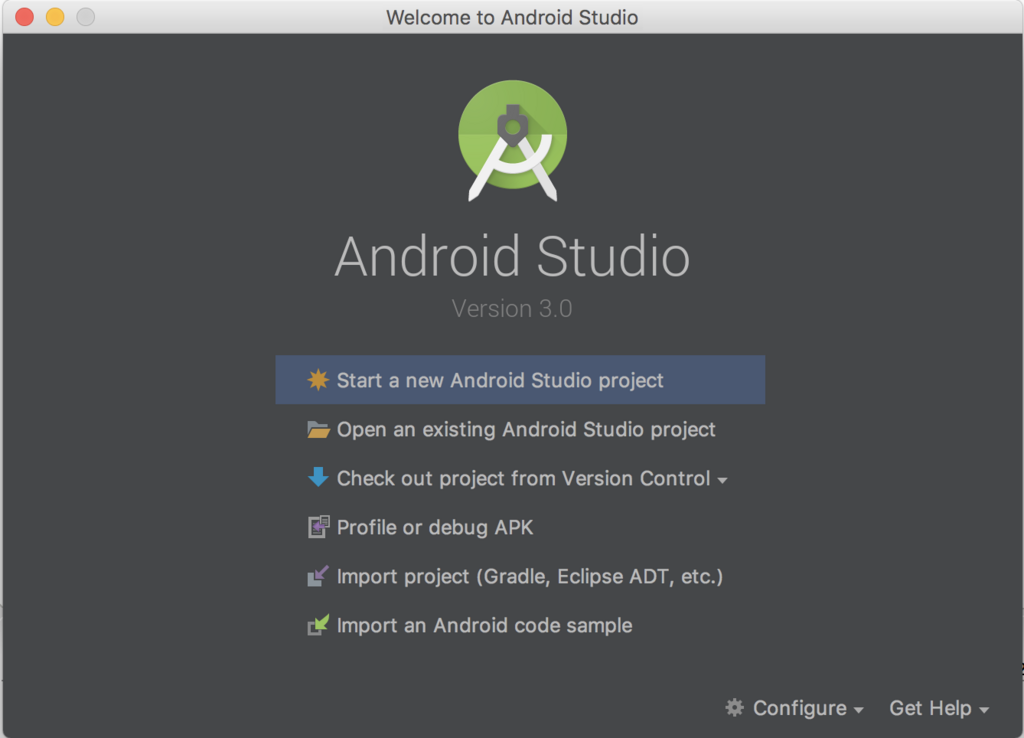
インストールが終わったら、新しいプロジェクトを作成しましょう!

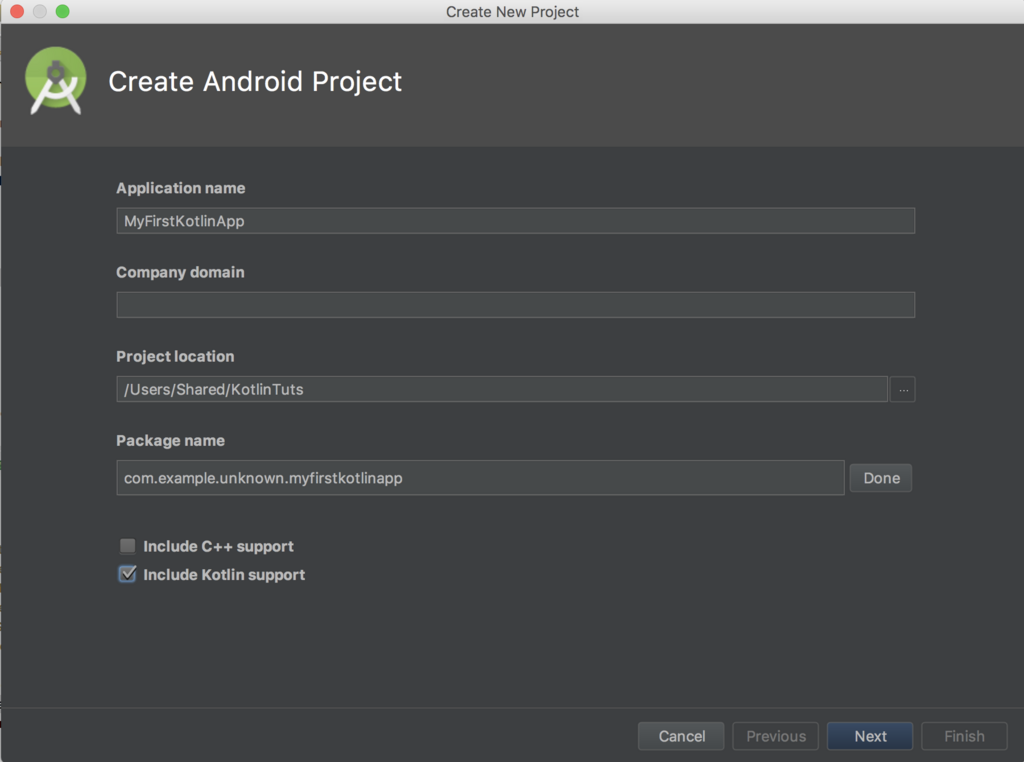
f:id:TinkerJack:20171027123425p:plain
プロジェクト作成画面

Android Studio 3.0以降、コトリンのサポートが入っています!(Android Studio 3.0以前はわざわざライブライのプラグインをインストールしなきゃいけなかった)、 なので "Include Kotlin Support"のチェックボックスにチェックを入れます。

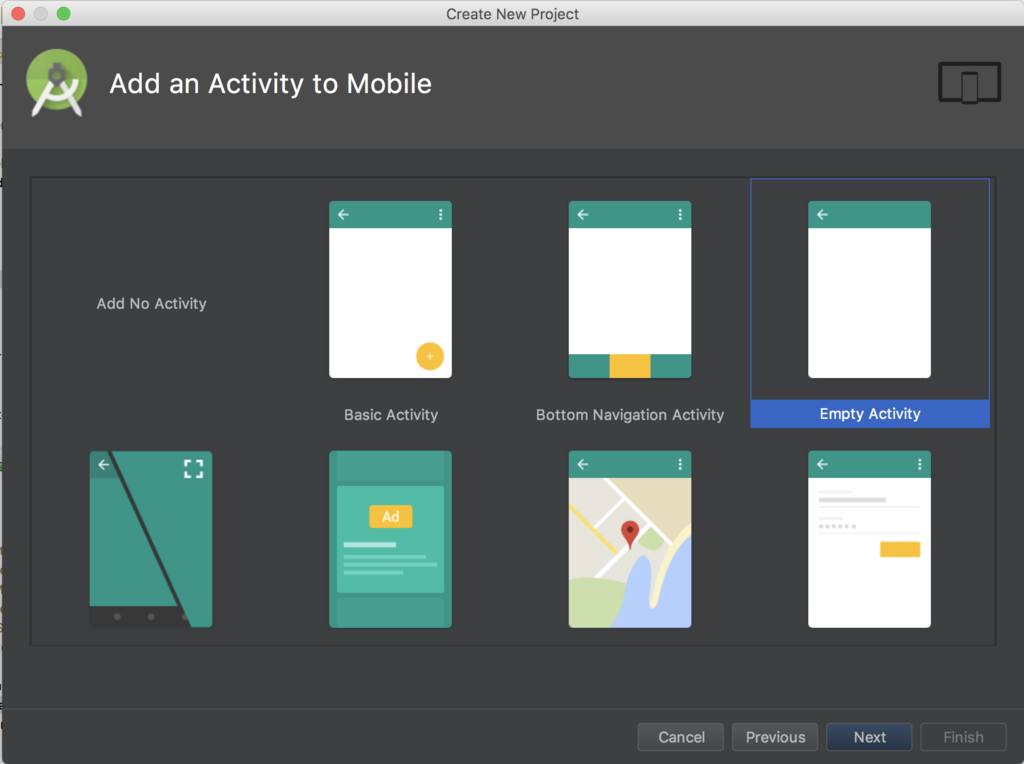
f:id:TinkerJack:20171027123059p:plain
Kotlin対応の導入

Activityの種類を選びましょう!(ハローコトリンを画面に出すだけなので、"Empty Activity"を選択しましょう)

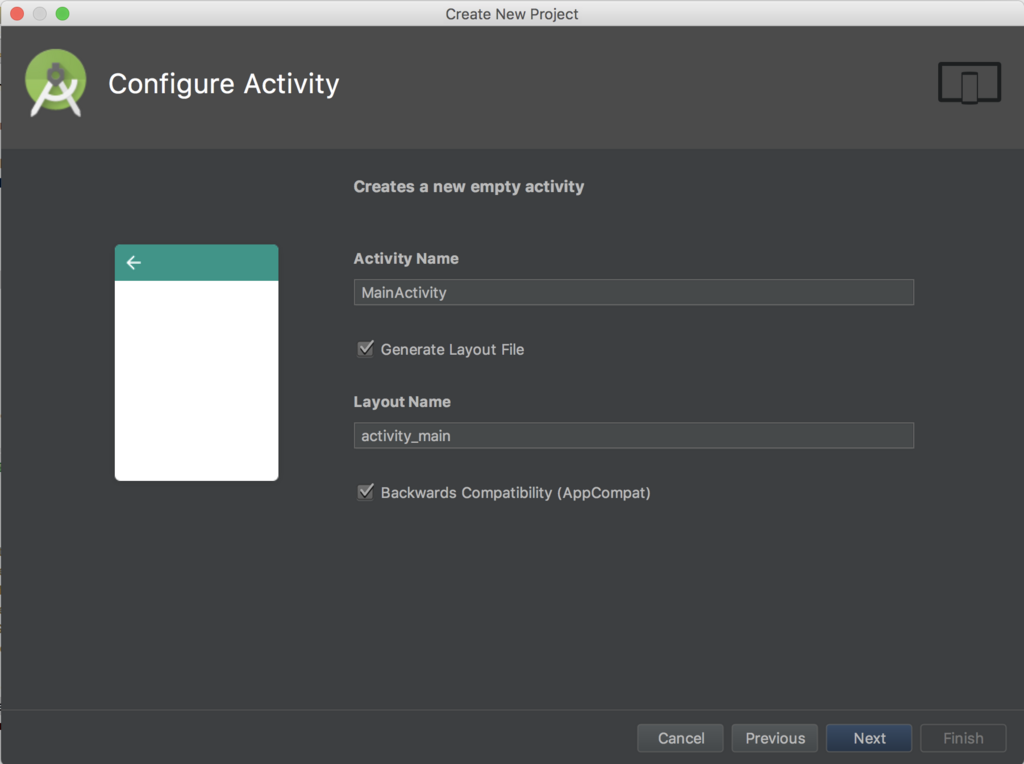
f:id:TinkerJack:20171027123357p:plain
Activity種別の選択

Activityとlayout名を設定しましょう。こちらでコトリンの処理を書きます!

f:id:TinkerJack:20171027123401p:plain
Activity名を設定

これでプロジェクトの作成が完了しました!

ただ、依存関係が足りていないためにエラーが現れる可能性があります。ですが、Android Studioが必要な依存関係を教えてくれるので、エラーが出た場合はそれらをダウンロードしてgradleのプロジェクトをSynchronizeすれば解決する筈です!

プロジェクトを作成出来ました!

Androidの端末があると便利なんですが、やはり最近の端末がなかなか買いられないものなのです。 でも大丈夫です!Android Studioで仮想端末(Virtual Device)を作ることが出来ます! なので次はバーチャルデバイスの作成です!

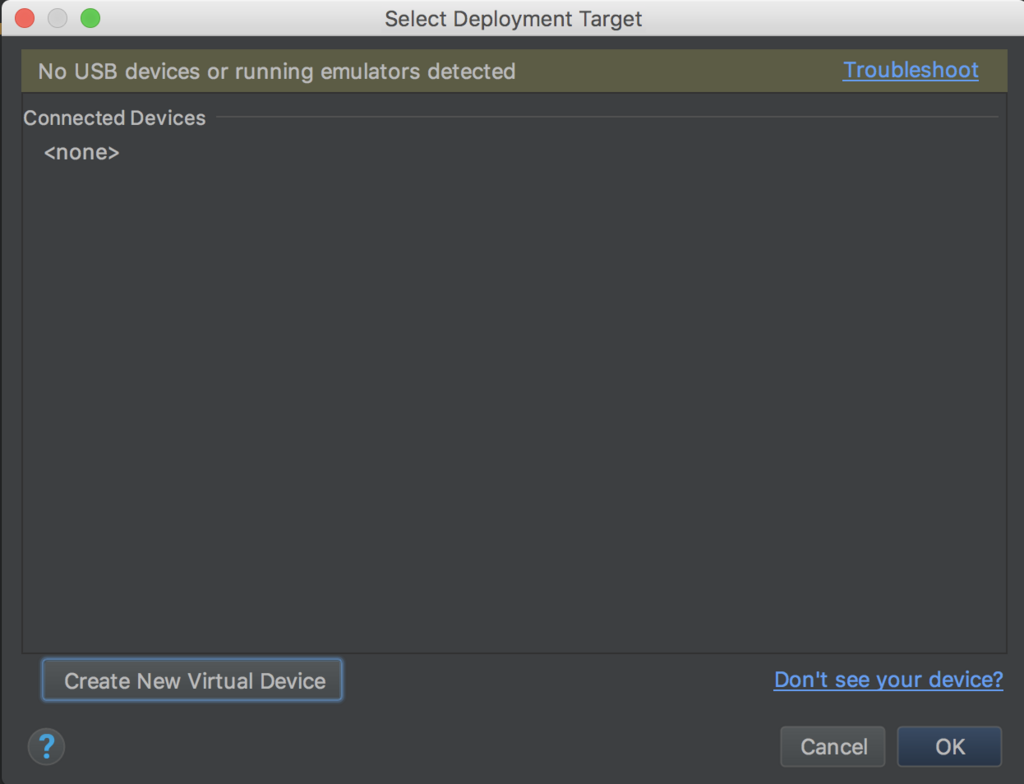
アプリを実行(Playボタンを押すことで)したら、現在使われているデバイスの画面が表示されます! その時は "Create a New Virtual Device"を選択します!

f:id:TinkerJack:20171027123406p:plain
バーチャルデバイスの作成

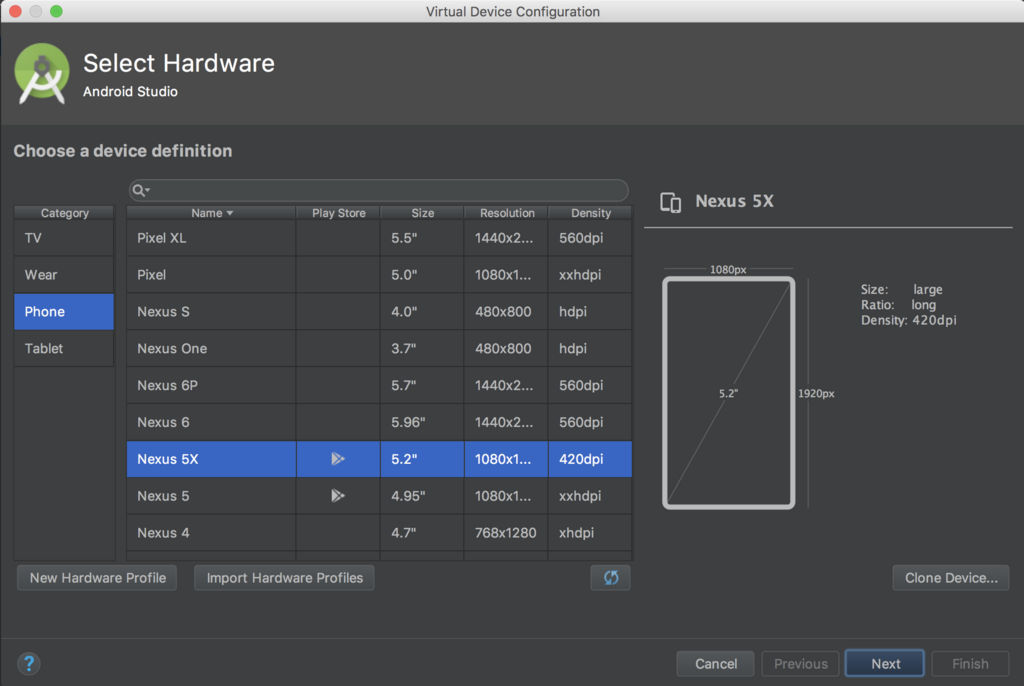
ここで作りたい仮想端末を選択できます!

f:id:TinkerJack:20171027144507p:plain
バーチャルデバイスの選択

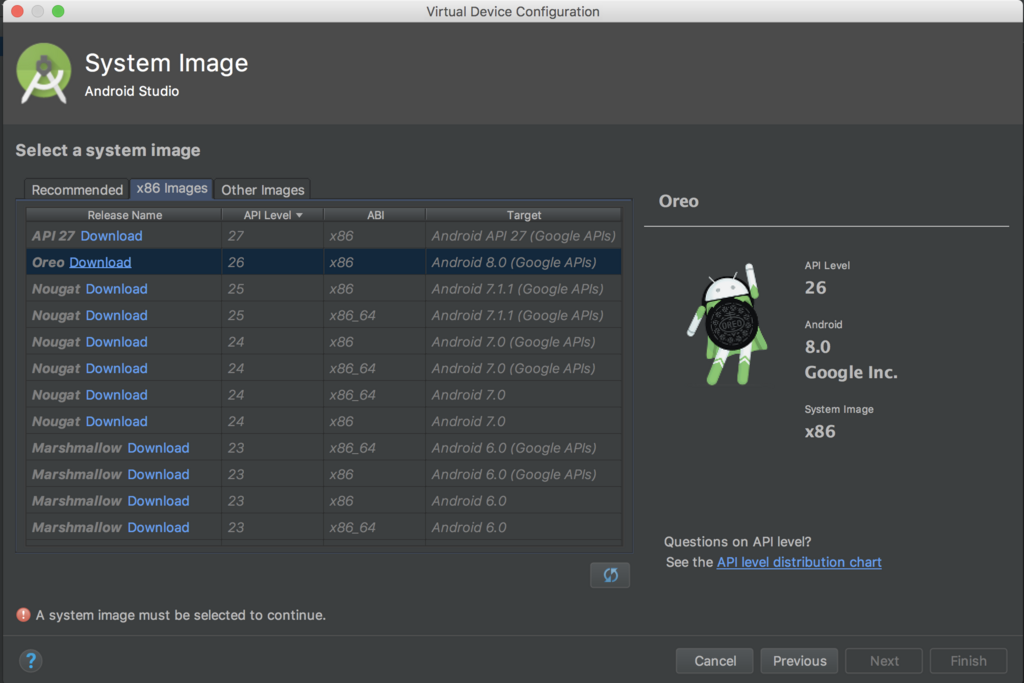
アプリのためのデフォルト画像を選択しなきゃいけません。 そのために画像をダウンロードする必要があります!

f:id:TinkerJack:20171027123353p:plain
アプリ画像

こちらをダウンロードして "finish" を押したら、バーチャルデバイスの作成は完了します!

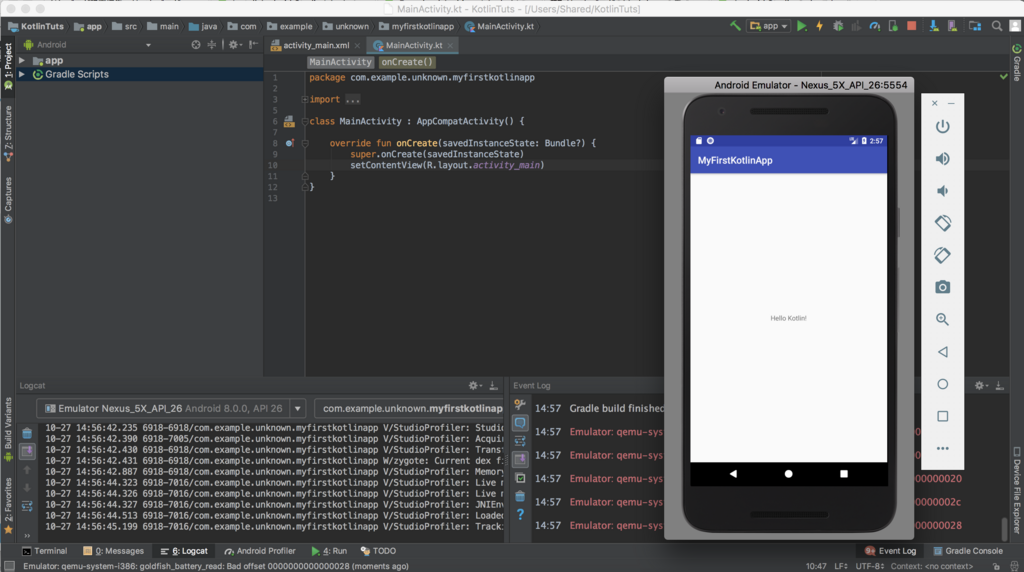
これで使えるスケレトンコードとバーチャルデバイスの準備が整ったので、アプリを実行してみましょう!

f:id:TinkerJack:20171027145831p:plain
ハローコトリン!

おめでとうございます!これで初めてのコトリンのAndroidアプリの作成が完了しました!

お楽しみいただけたでしょうか!

次回までkotlinの勉強や開発でお楽しみください!!

ゴーリストエンジニア
イムラーン

Angularでng2-chartsを使ってグラフを描画する

おはようございます。 ゴーリスト新卒一年目、見習い開発者のバンナイです。

このブログの背景

先日、弊社で、AngularJSを使って書かれていたWEBアプリケーションをAngular4で書き換えるというプロジェクトに携わらせてもらいました。

初めてのフロントコーディング、初めてのフロントでの外部ライブラリの使用、初めてのAngular、ということでいろいろなことがありました。

その中でも比較的時間が割かれたグラフ機能に関して色々やったことをブログに書きたいと思います。

  1. 最初のグラフが描画されるまで
  2. グラフの見た目を整える
  3. グラフを動的に描画する

の三本立てで書きたいと思います。

準備

使用ライブラリ

valor-software.com

というライブラリを使いました。

早速 https://valor-software.com/ng2-charts/ に書いてあるInstallationとやAPI等を参考にして最初のグラフを描画してみたいと思います!

インストール

まずAngularCLIで新しいAngularプロジェクトを作ります。

その後、

Installation

に従い

npm install ng2-charts --save
npm install chart.js --save

ng2-chartsとchart.jsをインストール。

ng2-chartsだけではなくchart.jsもインストールするんですね。

後はindex.htmlのheadタグの中に

<script src="../node_modules/chart.js/src/chart.js"></script>

を書き込みました。

弊社都合によりバージョンを固定します。 以下のようにpackage.jsonのバージョンの部分を書き変えます。

"chart.js": "~2.5.0
"ng2-charts": "~1.5.0"

この後バージョンを反映させるために

npm install

を使います。

import

APIのUsage

を参考に

import { ChartsModule } from 'ng2-charts';

// In your App's module:
imports: [
   ChartsModule
]

をここでも言われるがままに適宜書きます。 僕はapp.module.tsに書きました。

Canvasタグ

僕が描画したいのは棒グラフなので

Bar Chart

の部分にあるソースコードをコピります。

<div>
  <div style="display: block">
    <canvas baseChart
            [datasets]="barChartData"
            [labels]="barChartLabels"
            [options]="barChartOptions"
            [legend]="barChartLegend"
            [chartType]="barChartType"
            (chartHover)="chartHovered($event)"
            (chartClick)="chartClicked($event)"></canvas>
  </div>
  <button (click)="randomize()">Update</button>
</div>

をhtmlファイルに

import { Component } from '@angular/core';
 
@Component({
  selector: 'bar-chart-demo',
  templateUrl: './bar-chart-demo.html'
})
export class BarChartDemoComponent {
  public barChartOptions:any = {
    scaleShowVerticalLines: false,
    responsive: true
  };
  public barChartLabels:string[] = ['2006', '2007', '2008', '2009', '2010', '2011', '2012'];
  public barChartType:string = 'bar';
  public barChartLegend:boolean = true;
 
  public barChartData:any[] = [
    {data: [65, 59, 80, 81, 56, 55, 40], label: 'Series A'},
    {data: [28, 48, 40, 19, 86, 27, 90], label: 'Series B'}
  ];
 
  // events
  public chartClicked(e:any):void {
    console.log(e);
  }
 
  public chartHovered(e:any):void {
    console.log(e);
  }
 
  public randomize():void {
    // Only Change 3 values
    let data = [
      Math.round(Math.random() * 100),
      59,
      80,
      (Math.random() * 100),
      56,
      (Math.random() * 100),
      40];
    let clone = JSON.parse(JSON.stringify(this.barChartData));
    clone[0].data = data;
    this.barChartData = clone;
    /**
     * (My guess), for Angular to recognize the change in the dataset
     * it has to change the dataset variable directly,
     * so one way around it, is to clone the data, change it and then
     * assign it;
     */
  }
}

をtsファイルに貼り付けます。

バグ?

これでグラフが描画される…はずだったのですが描画されません。 コンソールを見てみると f:id:bbbbbbbbb9:20171019174912p:plain

なんだかこれが原因かなというエラーが出ていました。

まったく意味が不明だったのでこのメッセージでそのままググってみました。結果。

index.htmlのheadタグに貼り付けた

<script src="node_modules/chart.js/src/chart.js"></script>

を消して

angular-cli.jsonのscripts項目に

"scripts": [
        "../node_modules/chart.js/src/chart.js"
],

と書くと上手くいくみたいです。謎です。

他にもいろいろな解決策が書いてありましたが僕はこれでうまくいきました。

これでグラフが描画されました。

f:id:bbbbbbbbb9:20171019175454p:plain

よかった~。

次のブログではオプションなどをいじってグラフの見た目等を色々といじっていきます。

最終的にグラフが、様々な数値やグラフの本数で動的に描画されるようになるのですが、その際にどんな条件でも見た目が崩れないようにする等、予想外にやることが沢山ありました。

AWS RDSにJDBCでSSL接続する

こんにちは。ゴーリスト開発の飯尾です。
AWS RDS for MySQLに、SSL証明書を使ってJDBC接続する時に行ったことをまとめました。

前提

  • RDSのセキュリティグループで自IPからのアクセスを許可しておく
  • 2017年10月の試行メモ

手順

1. 証明書をゲットだぜ

$ wget https://s3.amazonaws.com/rds-downloads/rds-combined-ca-bundle.pem

2. 証明書をjksファイルに変換する

YOUR_JKS_PASSWORDのところはお好みで変えてください。

Macなのでこう

$ split -p "-----BEGIN CERTIFICATE-----" rds-combined-ca-bundle.pem individual-
$ find . -iname 'individual*' -exec keytool -import -file {} -alias {} -storepass YOUR_JKS_PASSWORD -keystore amazon.jks \;

Linuxならcsplitで分割して同様にひとつのjksファイルにまとめる。

このへんを見ました。
Using Java to establish a secure connection to MySQL Amazon RDS (SSL/TLS) - Stack Overflow

3. 作成したjksファイルを任意のフォルダに移動

# mkdir /opt/jks
# mv amazon.jks /opt/jks

4. 接続URLに各パラメータを追加する

  • useSSL=true
  • requireSSL=true
  • verifyServerCertificate=true
  • trustCertificateKeyStoreUrl=file:///opt/jks/amazon.jks # 作成したjksファイルのパス
  • trustCertificateKeyStoreType=JKS
  • trustCertificateKeyStorePassword=YOUR_JKS_PASSWORD # jksファイル作成時に設定したパスワード

こんなかんじになりました

jdbc:mysql://YOUR_SERVER/YOUR_DB?characterEncoding=UTF8&useSSL=true&requireSSL=true&verifyServerCertificate=true&trustCertificateKeyStoreUrl=file:///opt/jks/amazon.jks&trustCertificateKeyStoreType=JKS&trustCertificateKeyStorePassword=YOUR_JKS_PASSWORD

5. あとはいつものとおりDriverManager.getConnection

参考URL

qiita.com

blog.cles.jp

stackoverflow.com

MySQL :: MySQL Connector/J 5.1 Developer Guide :: 5.5 Connecting Securely Using SSL

JKS 形式のキーストアの作成 (SSL をサポートする Java CAPS の構成)

EC2上のTomcatからRDSにSSL接続する方法 | infoScoop開発者ブログ

ひとこと

真面目さがアフレデル〜

【GoogleMapsAPI】Javaで住所から緯度経度を取得する

こんにちは。ゴーリスト開発の飯尾です。

住所から緯度経度を割り出そ〜というときにはどうしたものか。

国交省のデータを使うという手もありますが
田舎は詳細データなくてちょっと精度がこころもとないし、
表記ぶれにも弱くて使いづらいところがあります。

そこで天下のGoogle御大よ
GoogleMapsAPIのジオコーダーを使うとかんたんに詳細な緯度経度を取得できます。

そんなわけでJavaで住所から緯度経度を取得する方法のメモです。

手順

  1. APIキーを取得
  2. GoogleMapsAPIのJavaクライアントライブラリを入れる
  3. つかう

説明

1. APIキーを取得

以下リンクからはじまり
キーの取得、認証  |  Google Maps Geocoding API  |  Google Developers

「キーを取得する」ボタンをポチッとな
f:id:y-iio:20171012184920p:plain

てきとうなプロジェクト名で登録
f:id:y-iio:20171012185007p:plain

取得完了
f:id:y-iio:20171012185113p:plain

やったね

2. GoogleMapsAPIのJavaクライアントライブラリを入れる

公式がライブラリ出しているので遠慮なく使わしてもらう

Google マップ ウェブサービスのクライアント ライブラリ  |  Google マップ ウェブサービス API  |  Google Developers

github.com

GradleプロジェクトなんでMavenからひっぱってきました

build.gradle

dependencies {
    compile 'com.google.maps:google-maps-services:0.2.2'
    compile 'org.slf4j:slf4j-nop:1.7.25'
}

3. つかう

雑だけどこんなんでいけるんじゃないか

public class Geocoder {

    private static GeoApiContext context = new GeoApiContext.Builder()
            .apiKey("YOUR_API_KEY") // さっき取得したAPIキー
            .build();

    public static void main(String[] args) {
        GeocodingResult[] resluts = getResults("東京都千代田区神田須田町1-18");
        if (results != null && results.length > 0) {
            LatLng latLng = results[0].geometry.location; // とりあえず一番上のデータを使う
            System.out.println("緯度 : " + latLng.lat);
            System.out.println("経度 : " + latLng.lng);
        }
    }

    public static GeocodingResult[] getResults(String address) throws ApiException, InterruptedException, IOException {
        GeocodingApiRequest req = GeocodingApi.newRequest(context)
                .address(address)
                // .components(ComponentFilter.country("JP"))
                .language("ja");

        try {
            GeocodingResult[] results = req.await();
            if (results == null || results.length == 0) {
                // ZERO_RESULTSはresults.length==0の空配列がsuccessful扱いで返ってくるっぽい
                System.out.println("zero results.");
            }
            return results;
        } catch (ApiException e) {
            // ZERO_RESULTS以外のApiExceptionはこっちで
            System.out.println("geocode failed.");
            System.out.println(e);
            return null;
        } catch (Exception e) {
            System.out.println("error.");
            System.out.println(e);
            return null;
        }
    }

}

所感

きになったところ

その1

ステータスコードZERO_RESULTSのときは
ApiExceptionにひっかからないで空の配列が返ってくるっぽかった

その2

GeocodingApiRequest でコンポーネントフィルタかけてリザルトを国内のみに限定したら
.components(ComponentFilter.country("JP"))のところ)
ヘンテコな住所送った時にZERO_RESULTSにならずに
「日本」のジオコード結果が返ってきてしまって不便だったのでコメントアウトしている…

よいところ

その1

リザルトオブジェクトとか用意してくれてるのがうれし〜

その2

プレミアムプランのときの認証が楽
リクエストURL署名までしてくれるのがうれし〜

一言

快適なジオコーディングでQOLをあげていく( ◜◡^)

おわり