こんにちは。ゴーリスト開発のイイオです。
先輩エンジニアモリツグさんの投稿で覚えもめでたい、angular-google-mapsでカスタムオーバーレイの続編です。
今回はカスタムオーバーレイでDOMをマーカーっぽく描画する必要に迫られた場合の解決方法を記しておきます。
やったことまとめ
- カスタムオーバーレイを描画する
- カスタムオーバーレイを緯度経度指定で描画してマーカーっぽく見せる
- カスタムオーバーレイにクリックイベントをつける
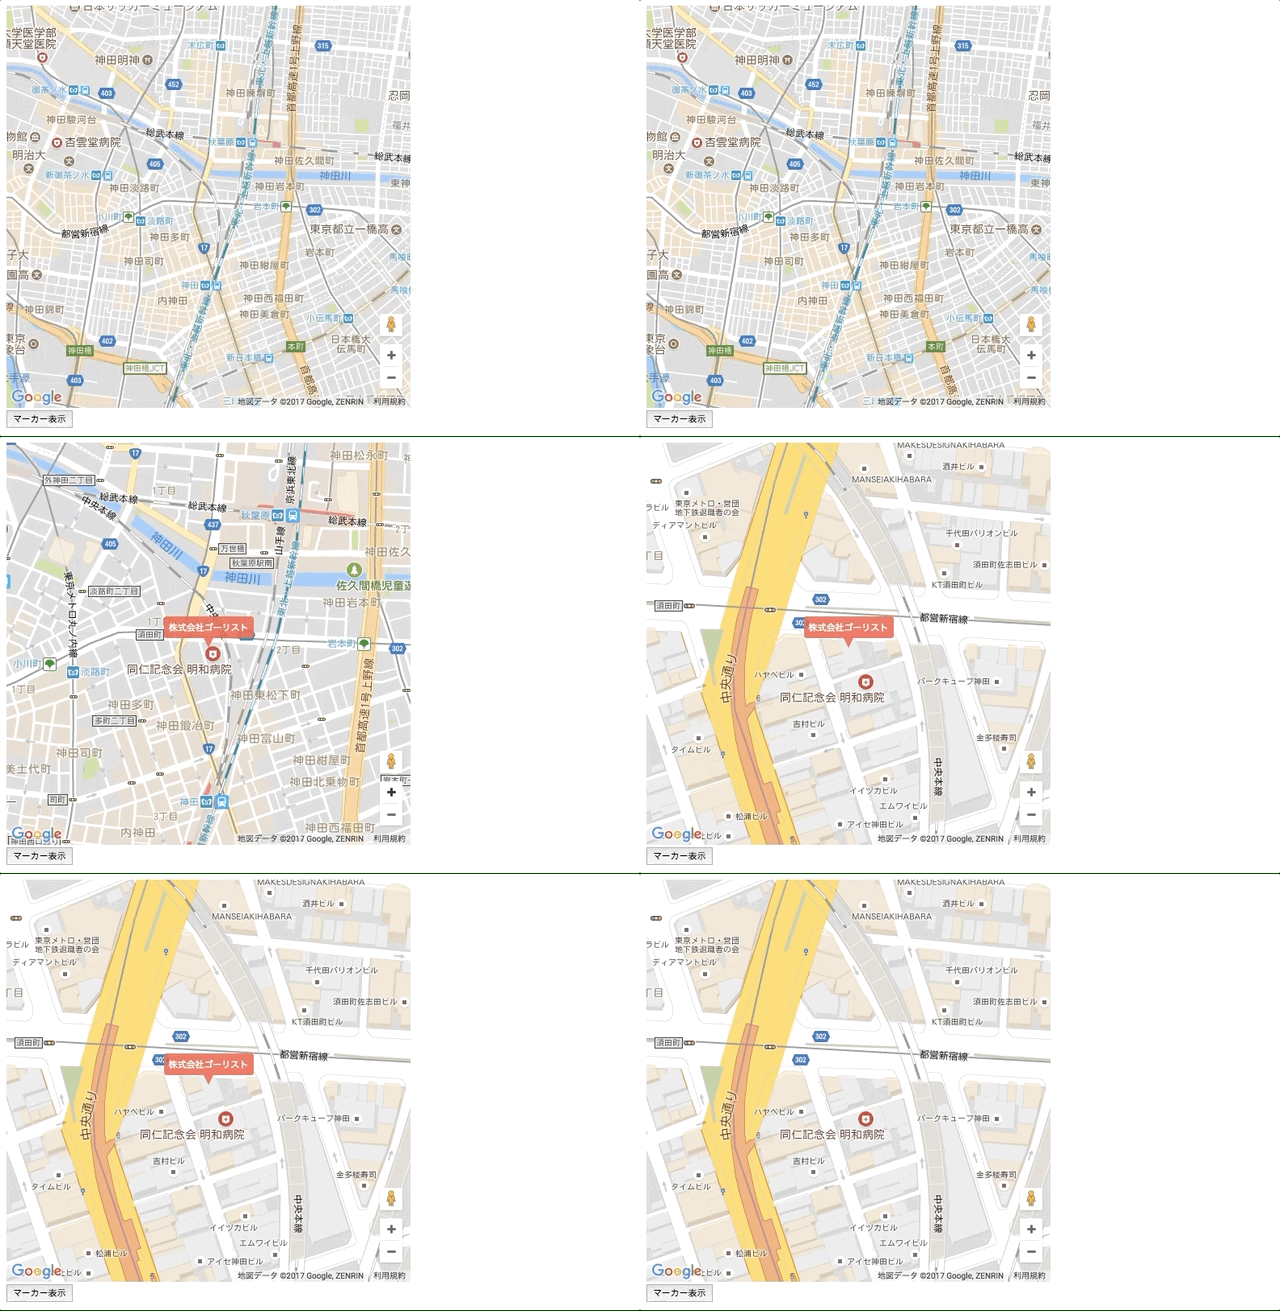
とりあえずできたものはこんな感じに動かせます。

マーカーを表示して
ズームインしたらうまいこと位置調整が入って
マーカークリックイベント拾ってアラート表示
マーカーを非表示にする
みたいな流れです。
ここからが解説だ
何は無くともangular-google-mapsを入れます。
npm i --save @agm/core
app.module.tsにインポート文追加します。
APIキーはご自分のをドウゾ。
@NgModule({
  ・・・
  imports: [
    AgmCoreModule.forRoot({
      apiKey: 'YOUR_API_KEY'
    })
  ],
  ・・・
})
コンパイル時に google is not defined で怒られるので型定義も入れておきます。
npm i --save @types/googlemaps
使うところでインポート文を入れます。
import {} from '@types/googlemaps';
angular-google-maps公式のGetting startedを見ながら地図を表示させる。
いや決してめんどくさくなったわけではオボボボボ
CSSで高さ指定しないと表示できないので注意です。
で、先人の知恵を見ながらこんな感じに書いてみた。
任意のタイミングでマーカー表示/非表示したいのでちょっと変えてます。
app.component.ts
import { Component } from '@angular/core';
import {} from '@types/googlemaps';
import { GoogleMap } from '@agm/core/services/google-maps-types';

const cont: object = {
  label: '株式会社ゴーリスト',
  lat: 35.695568,
  lng: 139.771055
};

@Component({
  selector: 'app-root',
  templateUrl: './app.component.html',
  styleUrls: ['./app.component.scss']
})
export class AppComponent {
  public lat: number = 35.695568;
  public lng: number = 139.771055;
  public zoom: number = 15;
  private nativeMap: GoogleMap;
  private overlays: any[] = [];

  public onMapReady(map: GoogleMap): void {
    this.nativeMap = map;
  }

  public toggleShowMarker(): void {
    if (this.overlays.length > 0) {
      this.removeMarker();
    } else {
      this.drawMarker();
    }
  }

  private drawMarker(): void {

    class CustomOverlay extends google.maps.OverlayView {
      map_;
      content_;
      div_;

      constructor(map, content, self) {
        super();

        this.map_ = map;
        this.content_ = content
        this.div_ = null;

        this.setMap(map)

        self.overlays.push(this);
      }
      /**
       * onAdd is called when the map's panes are ready and the overlay has been
       * added to the map.
       */
      onAdd() {
        const div = document.createElement('div');
        div.style.borderStyle = 'none';
        div.style.borderWidth = '0px';
        div.style.position = 'absolute';
        div.innerHTML = '<div class="marker">' + this.content_.label + '</div>';

        this.div_ = div;

        // Add the element to the "overlayLayer" pane.
        const panes = this.getPanes();
        panes.overlayLayer.appendChild(div);

        // Add click event
        panes.overlayMouseTarget.appendChild(div);
        google.maps.event.addDomListener(div, 'click', () => {
          self.onMarkerClicked();
        });
        google.maps.event.trigger(this, 'ready');
      };

      draw() {
        const overlayProjection = this.getProjection();
        const pixel = overlayProjection.fromLatLngToDivPixel(
          new google.maps.LatLng(this.content_.lat, this.content_.lng)
        );

        // Resize the div to fit the indicated dimensions.
        const el = this.div_;
        const content = el.children[0];
        const content_height = content.clientHeight;
        const content_width = content.clientWidth;
        el.style.top = pixel.y - (content_height + 7) + 'px';
        el.style.left = pixel.x - (content_width / 2) + 'px';
      };

      // The onRemove() method will be called automatically from the API if
      // we ever set the overlay's map property to 'null'.
      onRemove() {
        this.div_.parentNode.removeChild(this.div_);
        this.div_ = null;
      };

    }

    const self = this;
    if (cont) {
      new CustomOverlay(this.nativeMap, cont, self);
    }
  }

  private removeMarker(): void {
    this.overlays.forEach((item) => {
      item.setMap(null);
    });
    this.overlays = [];
  }

  private onMarkerClicked(): void {
    alert('marker clicked');
  }
}
onMapReadyでネイティブな Google Mapオブジェクトを変数に特攻む。
drawMarkerのインナークラスでカスタムオーバレイを上書き、
newしたカスタムオーバーレイを配列に入れて保持。
(もともと複数マーカー表示していたのでこんなんなっている)
クリックイベントはDOM作ってからgoogle.maps.event.addDomListener()のところで指定。
描画時の位置は OverlayView.getProjection().fromLatLngToDivPixel()で緯度経度から特定。
吹き出しの矢印がちょうど緯度経度の位置に刺さるようにtopとleftのスタイル調整。
地図リサイズ時にdraw()がよびだされるのでその度に表示位置は変わる。
removeMarkerで作ったカスタムオーバーレイを破棄する。
(OverlayView.setMap(null);のところ)
みたいなかんじです。
他の部分のソースはこちら
マーカーのCSSはapp.component.scssに書いてもかからなかったのだけど
src/styles.scssのほうでグローバル指定したらいけました。
app.component.html
<agm-map [latitude]="lat" [longitude]="lng" [zoom]="zoom" (mapReady)="onMapReady($event)"></agm-map>
<button (click)="toggleShowMarker()">マーカー表示</button>
app.component.scss
agm-map {
  height: 500px;
  width: 500px;
}
src/styles.scss
/* You can add global styles to this file, and also import other style files */
.marker {
  padding: 5px 6px;
  border-radius: 3px;
  width: auto;
  background: tomato;
  color: #fff;
  opacity: 0.9;
  cursor: pointer;

  &:after {
    top: 100%;
    left: 50%;
    border: solid transparent;
    content: " ";
    height: 0;
    width: 0;
    position: absolute;
    pointer-events: none;
    border-color: rgba(255, 53, 31, 0);
    border-top-color: tomato;
    border-width: 12px 6px 0 6px;
    margin-left: -6px;
  }
}
まとめ
angular-google-mapsの日本語記事なさすぎて嘆きます。
そしてほんとうに
コンポーネントをカスタムオーバーレイに突っ込めるような修正がangular-google-mapsに入ることを期待しています!!!